> For the complete documentation index, see [llms.txt](https://ova-themes.gitbook.io/aovis/llms.txt). Markdown versions of documentation pages are available by appending `.md` to page URLs; this page is available as [Markdown](https://ova-themes.gitbook.io/aovis/scan-qr-code/application.md).
# Application
## Step 1: Config in Movie Settings
* You have to setup this before the customer booking an movie.
* Go to Movies >> Settings >> General tab >> "Scan Qrcode via" opiton choose "Application"
## Step 2: Download Application
This is application for mobile to scan Qr Code in Ticket. After Scan Ticket, The status of ticket will updated to checked and the customer can't use it again.
**Mobile Android OS**: We supports .APK file to install application for mobile you can download it in Package theme or link . We also support code to build application, so you can customize app to fit your purpose.
**Mobile IOS OS:** We supports code to build application, so you can build application then release it in Apple store.
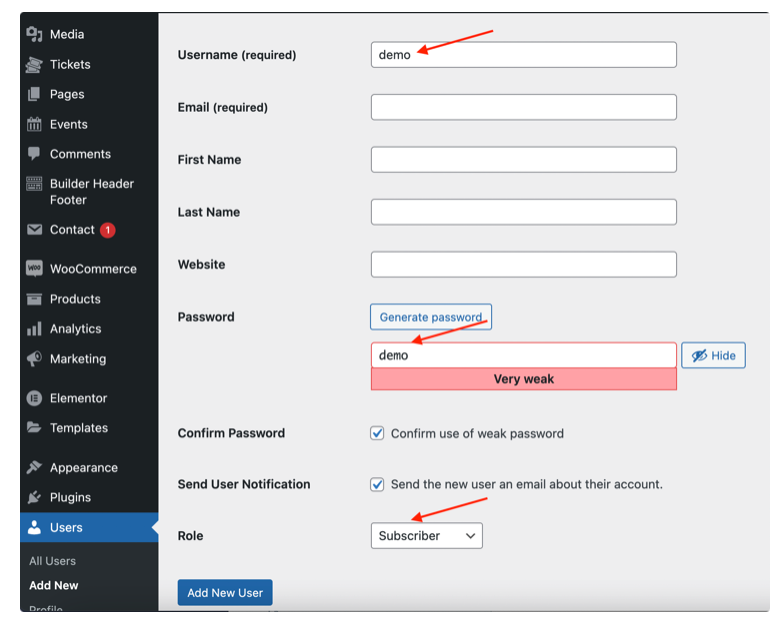
## Step 3: Create an user in site
Go to Users >> Add New
Example:
**Username**: demo
**Password**: demo
## Step 4: Assign username to per Movie
Go to Movies >> Choose a movie to edit >> Insert Username to "Username of staff" setting
## Step 5: Login App and Use App
Insert "Site address (URL) ": Go to Settings >> General >> Use "WordPress Address (URL)" setting for login.Username/Password: You created to step 1
For First Login: Please logout then login again
Then login again, you will see the all Movies that assign to username (Ex: demo).
Choose a movie to scan QR Code
Scan Qr Code: Valid Ticket
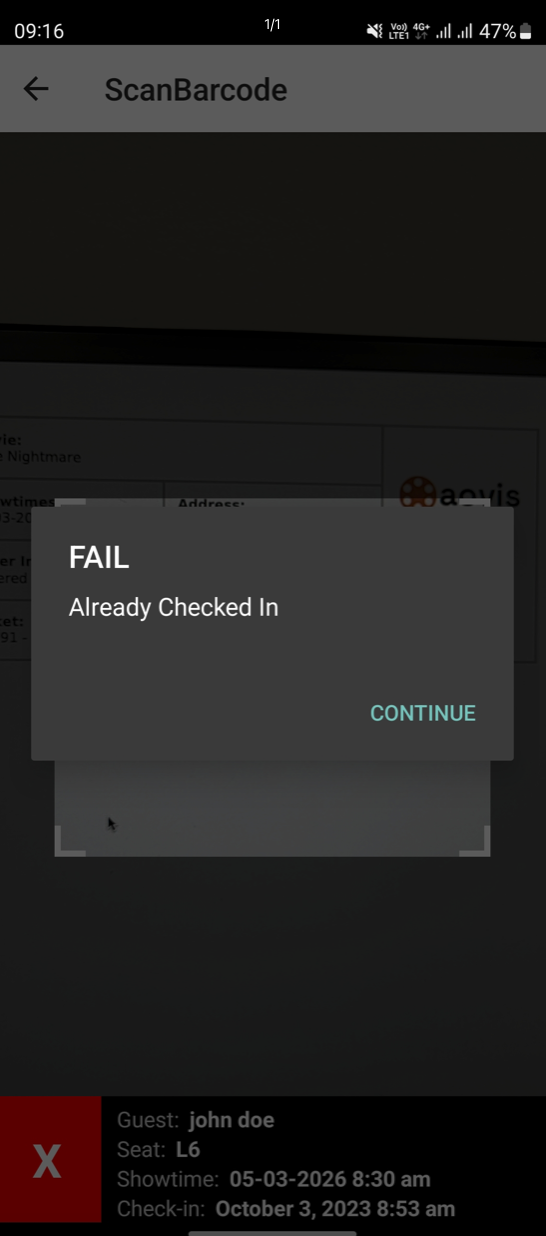
Scan Qr Code: Invalid Ticket