# Header Settings
## I: Choose a Header for All Pages.
Suppose that, you like to choose "Header 1" for all your pages
### Step 1: Choose Header in Global
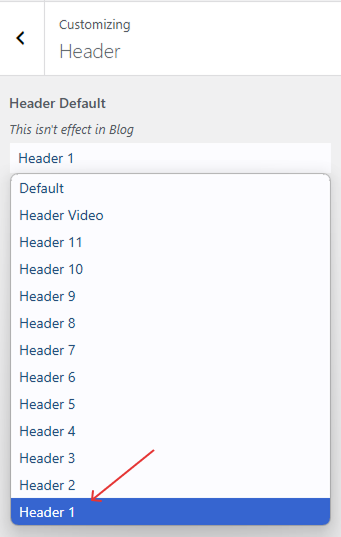
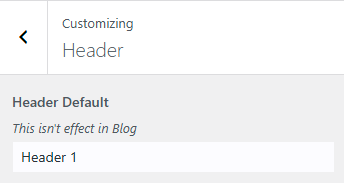
Go to Appearance >> Customize >> Header, select: "Header 1"
**Please, note**: The header you select in this section will be applied to all pages except blog pages and shop pages. Therefore, if you want to choose "Header 1" for these pages, follow the step 2 to do this.
### **Step 2: Choose Header for Blog Pages & Shop Pages**
* Go to Appearance >> Customize >> Blog >> Archive >> Header Dropdown: choose Header 1.
* Go to Appearance >> Customize >> Blog >> Single >> Header Dropdown: choose "Header 1".
* Go to Appearance >> Customize >> WooCommerce >> Header >> Header Archive Dropdown: choose Header 1.
* Go to Appearance >> Customize >> WooCommerce >> Header >> Header Single Dropdown: choose Header 1.
### Step 3: Choose "Global" Option in Header Version Drop-Down of All Pages
Go to: Pages >> All Pages >> Edit Every Page >> General Setting >> Header Version Drop-down: choose "Global" option
**Please, note**: To display General Setting Area, you have to install and active CMB2 plugin.
## II: Choose a Header for a Page
Go to Pages >> All Pages: choose a page that want to change its header, go to: General Setting area >> Header Version drop-down:
**Please, note**: To display General Setting Area, you have to install and active CMB2 plugin.
Options in Header Version drop-down:
* **Global**: Use the header that is set in Appearance >> Customize >> Header
* **Default**: Use Default Header. You only can customize this header in template file ( header.php file in theme)
* **Header 1, Header 2, Header 3, Header 4, Header 5, Header 6, Header 7, Header 8, Header 9, Header 10, Header 11, Header Video**: You can choose one of these headers for the page. If you choose these headers, you can change it in Builder Header Footer >> All HF
## III: Change Data for Header
Our theme supports 2 header types:
* Default header
* Headers built in Elementor
### 1: Change Data for Default Header
* **Change Logo for Default Header**: Appearance >> Customize >> Site Identity >> Logo Default tab: change logo.
* **Change Menu for Default Header**: Appearance >> Customize >> Menu
* **Modify other data for default header**: You need to change the data in the theme file (`template-parts/header-default.php`) if the header is the default header.
### 2: Modify Data for Headers Built in Elementor
You have to use Elementor to modify data for these headers
**Step 1: To edit these headers, you can follow 2 ways:**
* **The first way**: Login site with Administrator account, go to frontend, move on Edit with Elementor in the Site Bar, select: header Banner.
* **The second way**: Go to Builder Header Footer >> All HF >> Choose the header you want to change the data of it, then click: edit with Elementor
**Step 2: Click header section to display the menu for editing**
a menu will display and you can edit header here. You can edit or add all components for headers
**Step 3: Config general settings**
**+ Show the Structure**
The structure is used to display all elements of the header
**+ Create Sticky Header**
A **sticky header** is a navigation bar (or header) that **remains fixed at the top of the page** while the user scrolls down. This ensures that important navigation links, search bars, or call-to-action buttons are always accessible.
**a)** Create Sticky Header in Desktop, Tablet/Mobile.
From the menu, go to: Advanced tab >> Layout tab >> CSS Classes tab: Add the following classes as needed:ovamenu\_shrink ovamenu\_shrink\_mobile
* **header\_sticky**: Enables sticky functionality on Desktop devices.
* **mobile\_sticky**: Enables sticky functionality on Tablet/Mobile devices.
* **sticky\_bg\_dark**: Applies a dark background while scrolling
**b)** Show/hide Elements/Containers ( ex: header section ) in Desktop, Tablet/Mobile
From the menu, go to: Advanced tab >> Responsive tab
## IV: Change Image for Header Banner
***Please, note***: You need to change image for header banner with Elementor
### 1. Use an Image for all Header Banners
if you want to use an image for all header banners, follow below steps:
* **Step 1**: Go to: content tab in Elementor >> Display background by feature image in post/type tab: choose "No"
\
**Step 2**: Go to: Advanced tab >> Background
\
**Step 3**: Click the Public button
### 2. Use a Private Image for a Particular Banner
If you want to use a private image for a particular banner, follow below steps:
* Step 1: Suppose that I want to change header banner of Rental Page. Firstly, go to: rental page in the frontend. Then, move on: Edit with Elementor Tab >> Header 5
* **Step 2**: Go to: content tab in Elementor >> Display background by feature image in post/type tab: choose "Yes"
* **Step 3**: Go to "rental" page and set featured image for the page, then press "save" button.
**Step 4**: Go to Frontend to see
**Please, note**: Watch video for detailed guide on how to change image of header banner
{% embed url="" %}
## V: Create Mega Menu
### 1: Set in the Backend
* **Step 1**: Go to: Appearance >> Menus >> Select "Primary Menu"
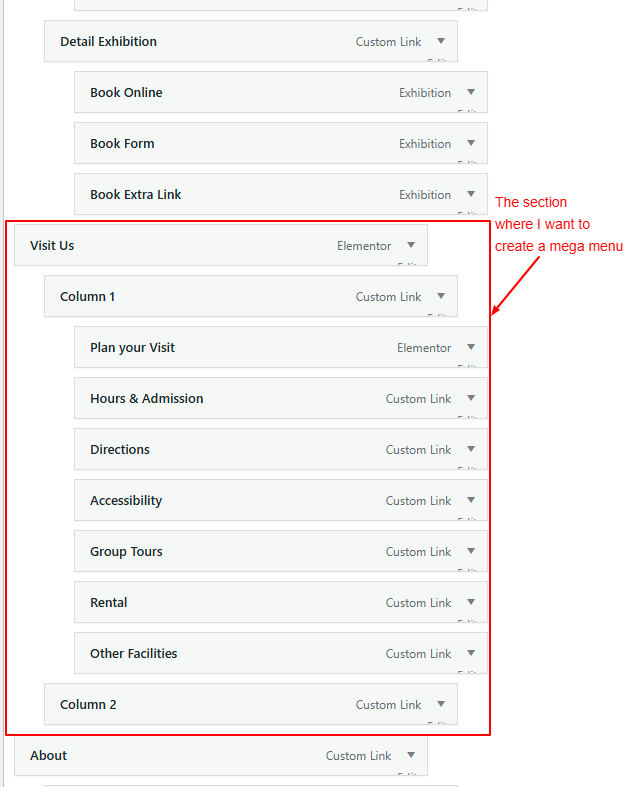
* **Step 2**: Move on the area where you want to create Mega Menu in Primary Menu. Suppose that I want to create Mega Menu in "Pages" area
\
**Step 3:** In Parent Men**u,** choose Menu Column: Support 1,2,3,4,5 columns. In Child Menu, insert a short code of each page, then check the box: "Show as a heading"
**Please, note**: You can add Shortcode to Column 2 like
\[muzze\_info hour\_label="Hours" hour\_info="Daily 9.30 am–6.00 pm" loc\_label="Location" loc\_info="2270 S Real Camino Lake California, US 90967" button\_icon="icon\_pin\_alt" button\_label="Getting Here" button\_link="" button\_target="\_blank" class="" /]
* **Step 3:** Choose "primary" option
### 2: Display in the Frontend